I'm still here...just ridiculously busy! Hence the 6:45 am post. Yes, I am already in my office. Yes, I have already finished a chapter of reading this morning. Yes, I was here until 8:30 last night. Yes, I am exhausted.
I don't have a new recipe for you today (sadly :-( I haven't cooked at home in so long I can barely remember), but I DO have a new favorite pizza that I've been ordering for those late-night study sessions, and I wanted to share it!
Obviously, this isn't the "perfect" nutritional balance, but it's not a bad option when you're in a bind and need some carry out. I always have lettuce around, so I usually just toss my own salad to go along with it (with one of my homemade salad dressings, of course! No chemicals/preservatives in my salad, thank you!)
Ok, so here is how I make my pizza...I like to order online, so it's easy to be picky and not feel like I'm seriously confusing whoever is on the other side of the phone
Crust: Thin! Whole wheat is best of course, but I haven't been able to find it. If you know of somewhere with whole wheat thin crust pizza, please leave a comment and let me know!
Cheese: Go easy...you don't need a massive bite of cheese to get that gooey cheesy taste. A little goes a long way.
Meat: Grilled chicken breast or even Canadian bacon...steer clear of sausage, pepperoni, bacon, hamburger, etc. These are loaded with saturated fat.
Veggies: Onion, bell pepper, mushroom, black olives, tomato, jalapeno...anything goes! This is the where you can really go crazy with your pizza. Onion, mushroom, and tomato? Pineapple and jalapeno? All of the above? You choose!
You're looking at about 200 calories per slice, plus MUCH lower in saturated fat, because you're cutting out the greasy meats (could be more...I used an online calorie counter to estimate, so keep that in mind if you're really watching your calorie intake. Most places have nutrition information online, so you can always check there).
This means that 2 slices of pizza plus a salad with 1 tbsp homemade vinaigrette is a complete meal with tons of veggies, some lean protein, healthy fat, and even whole grains if you find somewhere with whole wheat crust. Pizza anyone?
Wednesday, September 14, 2011

Saturday, September 3, 2011
Healthy Lunch Ideas
So sorry for disappearing for a while! My first full week of school had me as busy as can be, so my blog took the back burner temporarily. I've been spending a TON of time at school, some days for both lunch AND dinner. Because of this, I've been packing a lot of food to bring with me (I have a fridge in my office).
Here are some of my healthy brown-bag lunch/dinner suggestions!
1. Sandwiches/wraps- use whole wheat bread or tortillas for these
Traditional turkey sandwich - turkey breast, slice of swiss cheese, lettuce, sliced red onion, dijon mustard.
Southwest wrap - pre-cooked/leftover chicken, black beans, frozen corn kernels (thawed), diced tomato, cilantro, onion, lime juice and/or salsa
Grilled veggie sandwich or wrap - the night before, grill up some sliced zucchini and sliced portobello. Put the veggies in wrap or on a sandwich with some roasted red pepper (you can find this in a jar/can), a slice of provolone, pesto or hummus
2. Salads
Greek salad - romaine, olives, diced tomato, red onion, pepproccini, grilled chicken, greek dressing (mix 1/4 cup red wine vinegar, 3/4 cup extra virgin olive oil, 1/2 tsp dijon, 1 tsp each of oregano, basil, minced garlic, minced shallot, plus S&P to taste)
Pesto salad - mixed greens, diced pimentos (found in a jar), chopped artichoke hearts, pesto dressing, chicken or chickpeas (mix 1 part pre-made pesto, 1 part red wine vinegar)
3. My all time favorite packed lunch...leftovers!
Made a healthy dinner the night before? Bring some with you the next day! Most schools/offices have access to a microwave, so you can reheat and repeat your healthy meal.
The best part of bringing your lunch is that you make sure that you give yourself a healthy option and nothing else! When lunch time rolls around, you don't head to the nearest drive thru or dining hall, because all you need is already packed in your lunch.
The second best part? Saving money! No eating out plus getting rid of leftovers equals big savings! On my grad school budget, this is a HUGE bonus :-)
Here are some of my healthy brown-bag lunch/dinner suggestions!
1. Sandwiches/wraps- use whole wheat bread or tortillas for these
Traditional turkey sandwich - turkey breast, slice of swiss cheese, lettuce, sliced red onion, dijon mustard.
Southwest wrap - pre-cooked/leftover chicken, black beans, frozen corn kernels (thawed), diced tomato, cilantro, onion, lime juice and/or salsa
Grilled veggie sandwich or wrap - the night before, grill up some sliced zucchini and sliced portobello. Put the veggies in wrap or on a sandwich with some roasted red pepper (you can find this in a jar/can), a slice of provolone, pesto or hummus
2. Salads
Greek salad - romaine, olives, diced tomato, red onion, pepproccini, grilled chicken, greek dressing (mix 1/4 cup red wine vinegar, 3/4 cup extra virgin olive oil, 1/2 tsp dijon, 1 tsp each of oregano, basil, minced garlic, minced shallot, plus S&P to taste)
Pesto salad - mixed greens, diced pimentos (found in a jar), chopped artichoke hearts, pesto dressing, chicken or chickpeas (mix 1 part pre-made pesto, 1 part red wine vinegar)
3. My all time favorite packed lunch...leftovers!
Made a healthy dinner the night before? Bring some with you the next day! Most schools/offices have access to a microwave, so you can reheat and repeat your healthy meal.
The best part of bringing your lunch is that you make sure that you give yourself a healthy option and nothing else! When lunch time rolls around, you don't head to the nearest drive thru or dining hall, because all you need is already packed in your lunch.
The second best part? Saving money! No eating out plus getting rid of leftovers equals big savings! On my grad school budget, this is a HUGE bonus :-)
Tuesday, August 23, 2011
Southwest Scram
I can't believe classes start tomorrow. I'm excited and nervous and scared and really happy all at the same time. I'll keep y'all posted on how my first week goes.

I always make new school-year resolutions, because for students, this is really the start of our year. It gives me a goal and something to work towards, which keeps me more focused in my classes and in other parts of my life. Here's my list of new year's resolutions:
1. Watch my spending, i.e., eat out less than 2 times a week, use more coupons, etc.
2. Finish all of my school work during the week, so I can have weekends free!
3. Keep improving my healthy habits! I've come a long way in the past few weeks, so my plan is to keep up the good work even with a crazy schedule.
Part of goal #1 for me is not letting so much food go bad. I throw away so much food, whether it's leftovers, produce that spoils, or sour milk. That was my dilemma this morning: I knew that a bunch of my produce was running out of time, so I wanted to make something that used as much of it as possible.
I started raiding my produce drawer, and I found these things: red bell pepper, jalapeño, red onion, cilantro, and 1/2 a can of black beans that I had leftover from the other night. All of these ingredients were screaming "something southwestern!" so I started chopping...and this is what I came up with:

HealthEasy Southwest Scram
Ingredients:
3 tbsp finely chopped red bell pepper
3 tbsp finely chopped red onion
1 tbsp minced fresh jalapeño
2 tbsp canned black beans, drained and rinsed
2 tbsp frozen corn kernels
3 egg whites
1 tbsp salsa (your choice!)
Fresh cilantro leaves to taste
Directions:
In a nonstick skillet sprayed with cooking spray, combine peppers and onion. Cook until onion starts to become translucent. Add in the black beans and corn and cook until both are heated through. Add the egg whites and scramble everything together. Cook until egg is fully cooked and firm. Top with cilantro and salsa.
***You could also add some diced tomatoes in with the black beans and corn! My tomatoes were looking a little sad, so I thought it was best to leave them out.
Good luck to everybody starting classes this week!
Tuesday, August 16, 2011
Berry-Banana Shake
I've never set specific fitness/diet goals before (aside from "eat better" and "exercise more"), and I decided it's time to start!
Current goal: Weight training 3-4 times a week for the next 2 weeks. Doable? Totally!
On that note...post-workout, especially if you're doing muscle building exercise, you want to make sure your body is getting plenty of protein and good carbs. It speeds up the recovery process and gives you energy. Smoothies are a great option for getting both of these! This recipe comes from my new diet plan from Tone It Up.
Side note: If you haven't heard of Tone It Up, I'm pretty much obsessed. It's these two trainers/nutrition coaches from California, and they have recipes, workouts, tips, and a bunch more. It's been a huge inspiration and motivator for me. There's even an online community full of other people who have the same struggles/successes on their health journey. Thanks to Annie for introducing me to TIU!
Mid-Morning Shake
Ingredients:
1/2 a banana
1/4 cup strawberries, halved (I just used 3 frozen whole strawberries)
1/4 cup blueberries (also frozen)
1 tsp all-natural 100% maple syrup
1 scoop vanilla protein powder (I used whey)
1 cup almond or rice milk (I used unsweetened vanilla almond milk)
Blend everything together until smooth!
Easy - check. Delicious - check.
Current goal: Weight training 3-4 times a week for the next 2 weeks. Doable? Totally!
On that note...post-workout, especially if you're doing muscle building exercise, you want to make sure your body is getting plenty of protein and good carbs. It speeds up the recovery process and gives you energy. Smoothies are a great option for getting both of these! This recipe comes from my new diet plan from Tone It Up.
Side note: If you haven't heard of Tone It Up, I'm pretty much obsessed. It's these two trainers/nutrition coaches from California, and they have recipes, workouts, tips, and a bunch more. It's been a huge inspiration and motivator for me. There's even an online community full of other people who have the same struggles/successes on their health journey. Thanks to Annie for introducing me to TIU!
Mid-Morning Shake
Ingredients:
1/2 a banana
1/4 cup strawberries, halved (I just used 3 frozen whole strawberries)
1/4 cup blueberries (also frozen)
1 tsp all-natural 100% maple syrup
1 scoop vanilla protein powder (I used whey)
1 cup almond or rice milk (I used unsweetened vanilla almond milk)
Blend everything together until smooth!
Easy - check. Delicious - check.
Monday, August 15, 2011
Product Reviews: Snack Bars
I require constant feeding. After 4 hours of not eating, I'm a completely different (and unpleasant) person. Like those snickers commercials where tough guys get turned into Betty White because they're hungry.
So I eat a lot of on-the-go, easy to keep with me snacks, like snack bars. It's taken me a while to find some I really like, but I've finally found some winners. Here's my take on a few!
Best for weight loss: ThinkThin

These are high protein, with a low glycemic index (meaning they have a low impact on our blood glucose levels, thus reducing the amount of insulin our body produces and preventing the "sugar crash"). They're a little bit dense, but still delicious.
Most natural: LaraBars


So I eat a lot of on-the-go, easy to keep with me snacks, like snack bars. It's taken me a while to find some I really like, but I've finally found some winners. Here's my take on a few!
Best for weight loss: ThinkThin

These are high protein, with a low glycemic index (meaning they have a low impact on our blood glucose levels, thus reducing the amount of insulin our body produces and preventing the "sugar crash"). They're a little bit dense, but still delicious.
Most natural: LaraBars
I ate a banana bread LaraBar the other day with three ingredients: Almonds, dates, unsweetened banana. In our preservative drenched world, it's almost unheard of to find something with a list of ingredients that we can recognize. The only bad part: dried fruit does tend to contain a lot of sugar, so this is not a good one to eat if you're watching your sugar intake.
Best all around: Luna
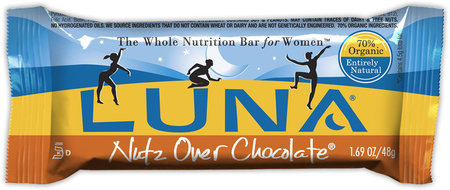
I've always been a loyal Luna bar consumer. They're usually less than 200 calories, and they're certified organic. These are also considered a low glycemic food. I think these taste the best too. The texture isn't too dense, so you don't have to chew for ages to take a bite. My favorite part though...they've added vitamins and minerals. It's like eating a vitamin bar :-)
Saturday, August 6, 2011
PomeCranate Spritzer
I'm unpacked! It's been a long week of unpacking, doing laundry, cleaning, and decorating (not to toot my own horn or anything, but my apartment is pretty adorable. I'm kind of obsessed with it.). Time to celebrate being settled into my new home, being on my own for the first time, and moving into the next phase of my life!

PomeCranate Spritzer
Ingredients:
1.5 oz. (1 shot) vodka
1.5 oz. pomegranate cranberry juice
Fresh squeeze juice from half a lime
Lime flavored sparkling water (like La Croix, but I use the generic stuff)
Ice
Fill a tall glass with ice. Add the vodka, pomegranate cranberry juice, and lime juice. Top with sparkling water.
Cheers!

PomeCranate Spritzer
Ingredients:
1.5 oz. (1 shot) vodka
1.5 oz. pomegranate cranberry juice
Fresh squeeze juice from half a lime
Lime flavored sparkling water (like La Croix, but I use the generic stuff)
Ice
Fill a tall glass with ice. Add the vodka, pomegranate cranberry juice, and lime juice. Top with sparkling water.
Cheers!
Thursday, August 4, 2011
Tilapia Ceviche
Today was another 100+ degree day in south Texas. When I was planning my dinner, I couldn't bring myself to use a stove or oven and make my apartment (and myself) even hotter. Cold ceviche sounded perfect. I actually only tried it for the first time a week ago, and I decided that I've really been missing out. I picked this particular recipe (one of Emeril's. Here's the original recipe) because it didn't use tomato and cucumber (two things I'm not a fan of, but if you like them, they would be great additions to this!).

Recipe Notes: This is my modified version of his recipe. I used more veggies and different fish, but otherwise I followed it pretty closely.
Tilapia Ceviche:
Ingredients:
1/4 lb. fresh tilapia
2 tbsp red bell pepper, diced
2 tbsp orange (or yellow) bell pepper, diced
1 tbsp serrano pepper, finely diced
2 tbsp red onion, minced
1 garlic clove, minced
Juice from 3 fresh limes
Juice from 1 fresh orange
2 tbsp pineapple juice
1 tbsp chopped fresh cilantro
1 tsp extra virgin olive oil
1/2 tsp kosher salt
Cut the fish into 1/4-inch dice. Place in a glass dish with the lime juice, orange juice, pineapple juice, peppers, onions, and garlic, tossing to coat. Cover and refrigerate for 3 to 4 hours, stirring occasionally.
Drain about half of the juice. Add the cilantro, olive oil, and salt. Fold gently to mix.

Comments: This was SUPER easy to make. It's another great "before you go to work" recipe that will be ready to go when you get home. I just ate it with a fork, but you can also put it on baked tortilla chips. This was the perfect "cool and refreshing" meal! I would have to be in the mood for it, but it was definitely a do-over :-)

Recipe Notes: This is my modified version of his recipe. I used more veggies and different fish, but otherwise I followed it pretty closely.
Tilapia Ceviche:
Ingredients:
1/4 lb. fresh tilapia
2 tbsp red bell pepper, diced
2 tbsp orange (or yellow) bell pepper, diced
1 tbsp serrano pepper, finely diced
2 tbsp red onion, minced
1 garlic clove, minced
Juice from 3 fresh limes
Juice from 1 fresh orange
2 tbsp pineapple juice
1 tbsp chopped fresh cilantro
1 tsp extra virgin olive oil
1/2 tsp kosher salt
Cut the fish into 1/4-inch dice. Place in a glass dish with the lime juice, orange juice, pineapple juice, peppers, onions, and garlic, tossing to coat. Cover and refrigerate for 3 to 4 hours, stirring occasionally.
Drain about half of the juice. Add the cilantro, olive oil, and salt. Fold gently to mix.

Comments: This was SUPER easy to make. It's another great "before you go to work" recipe that will be ready to go when you get home. I just ate it with a fork, but you can also put it on baked tortilla chips. This was the perfect "cool and refreshing" meal! I would have to be in the mood for it, but it was definitely a do-over :-)
Teriyaki Marinated Chicken Breast
I'm finally moved into my apartment! I have so many new things that I'm super excited about. Two of these are my macbook and my kitchen. Now that I have a webcam that actually works, I wanted to try out a vlog. It's unedited and it's also my very first one, so I apologize for the super amateur video. Enjoy!
Teriyaki Marinade
Ingredients:
1/2 cup low sodium soy sauce
1/4 cup fresh squeezed orange juice (or bottled juice to make things quicker)
2 tsp minced garlic
1 tbsp minced ginger
2 tbsp light brown sugar
1-2 tsp crushed red pepper flakes (optional)
Combine all ingredients in a bowl and whisk together. Pour over chicken, fish, or beef and let marinate.
To broil: Position a rack in the upper third of the oven, line a baking sheet with foil, and spray with nonstick cooking spray. Broil, watching carefully and turning at least once, until chicken reaches an internal temperature of 165 degrees, 10 to 15 minutes total (from Eating Well magazine)
My comments: You guys all got to see how quick this was, and broiling was just as simple! Except that the high heat caused any marinade on the pan to burn...thus setting off my fire alarm. That was not so simple. I'll probably bake at a lower heat next time, and just do it for 30-40 minutes. It was a little bit salty, so next time I will use less soy sauce, but I thought it was pretty tasty. And cleanup was a breeze with only a bowl and a measuring cup (the foil keeps you from having to wash the baking sheet).
Thursday, July 28, 2011
New leaf, new look
It's a bittersweet thing, but tomorrow is our last day of class for the summer. I am really going to miss my kids, but even more so, I'll miss all of the friends that I made this summer. On the "sweet" side of things, I'm moving this weekend! It's my first post-graduation step that says "I'm a big kid now," and I'm feeling very empowered and independent.

I learned a lot this summer, and I really do feel like a different person. Being in an environment where making healthy choices is difficult has helped me to realize how important my health is to me. It's always been important, but now it is my number one priority. I've decided to really buckle down and change my lifestyle for good.


I learned a lot this summer, and I really do feel like a different person. Being in an environment where making healthy choices is difficult has helped me to realize how important my health is to me. It's always been important, but now it is my number one priority. I've decided to really buckle down and change my lifestyle for good.
In honor of changing my lifestyle, I also changed up the look of my blog. I guess I felt inspired, but I consider it the first step in moving in the right direction. Let me know of any comments or suggestions you have that would make things easier for you to navigate!
And one more thing: I bought the Tone It Up! Diet plan. Expect several new recipes from this plan (once I actually have a kitchen). They always preach that this plan isn't a diet, it's a lifestyle. Since changing my lifestyle is my goal, I decided that my health was worth the splurge.

Time to turn a new leaf!
Tuesday, July 19, 2011
Peanut Butter and Banana Oatmeal
Only 13 more days until I'm in my new apartment! I can't wait to make myself an entire meal. I'm falling waaaaay out of my healthy eating habits. I blame the dining hall for offering like 4 options for every meal. And I don't mean each meal is 4 new options, I mean it's the same every single time. I'm so sick of the same mushy veggies that I have started doing the whole "Nothing sounds good...pasta with alfredo and chicken strips it is." Which is exactly what caused me to put on all of my college weight when I was living on campus.
I have managed to find a couple of go-to options that I actually like, and this is one of them. I don't have a picture, because I've been making it in the dining hall, but I did want to share the recipe! It's super easy, and you could use any time of plain oatmeal...instant, quick cooking, steel cut, or anything else really.
Peanut Butter and Banana Oatmeal
Ingredients:
3/4 cup cooked oatmeal (follow directions for whatever type of oatmeal you're using)
1 1/2 tbsp creamy peanut butter
1 small banana, cut into bite sized pieces
1 tsp honey
Add peanut butter and honey to cooked oatmeal and stir well to combine. Fold in banana.
Taste Rating: 7
Easy Rating: 9
Other than cutting up the banana, this is a breeze. Especially since the dining hall has ready-to-eat oatmeal. It still wouldn't be difficult if I had to make the oatmeal myself, though!
Overall Rating: 8
Given that this is a well-balanced meal on its own, I'm gonna say this is pretty awesome. Whole grains, fruit, healthy fats, protein...talk about a power breakfast!
I have managed to find a couple of go-to options that I actually like, and this is one of them. I don't have a picture, because I've been making it in the dining hall, but I did want to share the recipe! It's super easy, and you could use any time of plain oatmeal...instant, quick cooking, steel cut, or anything else really.
Peanut Butter and Banana Oatmeal
Ingredients:
3/4 cup cooked oatmeal (follow directions for whatever type of oatmeal you're using)
1 1/2 tbsp creamy peanut butter
1 small banana, cut into bite sized pieces
1 tsp honey
Add peanut butter and honey to cooked oatmeal and stir well to combine. Fold in banana.
Taste Rating: 7
Easy Rating: 9
Other than cutting up the banana, this is a breeze. Especially since the dining hall has ready-to-eat oatmeal. It still wouldn't be difficult if I had to make the oatmeal myself, though!
Overall Rating: 8
Given that this is a well-balanced meal on its own, I'm gonna say this is pretty awesome. Whole grains, fruit, healthy fats, protein...talk about a power breakfast!
Thursday, July 7, 2011
Honey-Jalapeno Vinaigrette
It's the last day off in between sessions, so I decided to use this time to make something delicious. I've been gorging on salads in the dining hall lately, because frequently, that's the only vegetable option there is. Only one hot line ever serves vegetables, and half the time it's corn, which is actually considered a starch. When I was still in school here, I absolutely despised the salad dressings, so I'm actually pretty shocked that it took me an entire month to get sick of it. But that time has come, so it's time to start bringing my own dressings.
I wanted to try a jalapeno vinaigrette, because Flying Saucer has one that I'm seriously obsessed with. I googled jalapeno vinaigrette, and based on the ingredients, I thought this one would be the best bet: honey jalapeno vinaigrette
Recipe Notes: I thought 1/3 cup of honey was entirely too much. I used about 2 tablespoons. I also added a little extra cilantro, probably another 1/2 tbsp or so. And I used bottled lime juice because I had some leftover from my melon pops.
Honey-jalapeno vinaigrette
Makes ¾ cup
1 ½ tablespoons white wine vinegar
1 ½ tablespoons fresh lime juice
1 tablespoon fresh cilantro, coarsely chopped
½ tablespoon chopped jalapeno
1 large clove garlic, quartered
½ teaspoon salt
¼ teaspoon freshly ground black pepper
1/3 cup honey
1/3 cup vegetable oil, such as canola
In a blender, process vinegar, lime juice, cilantro, jalapeno, garlic, salt and pepper. With blender running, slowly add honey, then oil until well blended.
Before I give ratings, here are some serving suggestions for Mexican inspired meals that I think would make great use of this recipe:
1. Side salad on taco night
2. With tortilla soup
3. "Fancier" taco salad: Mixed greens topped with thinly sliced lean steak (seasoned with fajita seasoning!), pico de gallo, corn, black beans, chopped onions
4. Use as a marinade for grilled chicken
Taste Rating: 7
Compared to the bottled, watered down salad dressings at the dining hall, this was like heaven. But I would definitely make some changes: more cilantro, more jalapeno! For a "spicy" dressing, this wasn't nearly spicy enough. But definitely a do-over, especially for a Mexican inspired meal.
Easy Rating: 8
I usually make my salad dressings in a little tupperware container and shake them up, so this was a little more work than usual. Not that it was hard or anything, just made some extra dishes. Also, I don't know if my blender blade is becoming dull or something, but the garlic would not break down. Next time, I'll use that pre-minced stuff that you get near the spices. Also, I'm going to find a way to invent a portable/dorm-friendly dishwasher.
Overall Rating: 7.5
I wanted to try a jalapeno vinaigrette, because Flying Saucer has one that I'm seriously obsessed with. I googled jalapeno vinaigrette, and based on the ingredients, I thought this one would be the best bet: honey jalapeno vinaigrette
Recipe Notes: I thought 1/3 cup of honey was entirely too much. I used about 2 tablespoons. I also added a little extra cilantro, probably another 1/2 tbsp or so. And I used bottled lime juice because I had some leftover from my melon pops.
Honey-jalapeno vinaigrette
Makes ¾ cup
1 ½ tablespoons white wine vinegar
1 ½ tablespoons fresh lime juice
1 tablespoon fresh cilantro, coarsely chopped
½ tablespoon chopped jalapeno
1 large clove garlic, quartered
½ teaspoon salt
¼ teaspoon freshly ground black pepper
1/3 cup honey
1/3 cup vegetable oil, such as canola
In a blender, process vinegar, lime juice, cilantro, jalapeno, garlic, salt and pepper. With blender running, slowly add honey, then oil until well blended.
Before I give ratings, here are some serving suggestions for Mexican inspired meals that I think would make great use of this recipe:
1. Side salad on taco night
2. With tortilla soup
3. "Fancier" taco salad: Mixed greens topped with thinly sliced lean steak (seasoned with fajita seasoning!), pico de gallo, corn, black beans, chopped onions
4. Use as a marinade for grilled chicken
Taste Rating: 7
Compared to the bottled, watered down salad dressings at the dining hall, this was like heaven. But I would definitely make some changes: more cilantro, more jalapeno! For a "spicy" dressing, this wasn't nearly spicy enough. But definitely a do-over, especially for a Mexican inspired meal.
Easy Rating: 8
I usually make my salad dressings in a little tupperware container and shake them up, so this was a little more work than usual. Not that it was hard or anything, just made some extra dishes. Also, I don't know if my blender blade is becoming dull or something, but the garlic would not break down. Next time, I'll use that pre-minced stuff that you get near the spices. Also, I'm going to find a way to invent a portable/dorm-friendly dishwasher.
Overall Rating: 7.5
Monday, June 27, 2011
Melon Stripe Ice Pops
I'm two weeks into term one at TIP, and my schedule is jam packed. I love my kids, but I haven't had much free time at all. I realized that I need to spend more time taking care of myself, so I'm starting the "Tone It Up! Bikini Challenge." It's an 8 week program designed by two trainers from California, Karena and Katrina. The program is actually over, but they posted all 40 challenges online for anybody who wanted to do it again, start over, or who missed it the first time. I would love to do this with you, so please let me know if you're interested in toning it up with me! Here's the link to the program: http://toneitup.com/blog.php?Bikini-Series-If-you-missed-it-5112.

One of the things that Karena and Katrina preach is eating chemical-free. No preservatives and NO artificial sweeteners! Time to cut out the fake sugar and switch to things like honey, agave nectar, stevia, and raw sugar. I saw some recipes for frozen popsicles in Women's Health magazine this month, most of which are 100% natural! I decided to make these fun summery desserts so that I can still have something sweet when cravings strike, without using processed sugar or sweeteners. Plus, they're fruit based, meaning low-calorie and full of nutrients!
P.S. My apologies for the blurry picture. My point-and-click camera was giving me problems.
P.S. My apologies for the blurry picture. My point-and-click camera was giving me problems.
Melon Stripe Ice Pops
Ingredients:
1 cup cantaloupe, diced
2 tbsp lime juice, divided
2 tsp honey, divided
1 cup honeydew, diced (I used seedless watermelon instead. I was buying pre-diced fruit, and they didn't have honeydew)
Directions:
In blender, combine cantaloupe with 1 tbsp lime juice and 1 tsp honey. Fill a fourth of each ice pop mold (3.5 oz. each) with cantaloupe and put in the freezer for 1 hour. Set remaining mixture aside (I recommend in the fridge).
In blender, combine honeydew with remaining lime juice and honey. After cantaloupe layer has set, add a layer of honeydew. Freeze for 1 hour. Add one additional layer of cantaloupe and then honeydew, allowing pops to set in the freezer for 1 hour between each layer. After pouring the final layer, insert sticks and freeze for another 4 hours. Makes 4 servings
Per serving: 40 cal; 0 g fat; 11 g carbs; 15 mg sodium, 1 g fiber; 1 g protein

Taste Rating: 6
These aren't bad at all! The lime juice gives them an interesting twist, and they're sweet but not too sweet. The texture is a little icy compared to regular popsicles, but I kind of like it. Definitely a great summer dessert/snack to have around!
These aren't bad at all! The lime juice gives them an interesting twist, and they're sweet but not too sweet. The texture is a little icy compared to regular popsicles, but I kind of like it. Definitely a great summer dessert/snack to have around!
Easy Rating: 7
Ok, so the layers take some patience. They look pretty cool, but unless I'm entertaining with these, I would probably just blend everything together at once and fill the popsicle molds on the first try without having to go back to it. Not that it was incredibly difficult, I just would rather not mess with it. Other than that, these are super simple. I'm becoming obsessed with my blender.
Overall Rating: 7
Sunday, June 19, 2011
Banana Peanut Butter Smoothie
Happy Father's Day! I had a great time making dinner with my mom for father's day. We made my dad steak with mushrooms, garlic mashed potatoes, and green beans. Plus a coffee ice cream pie for dessert. It was all sooo delicious! We ate a really late lunch (like at 3:00), so I knew I wouldn't be hungry for dinner. This smoothie seemed like the perfect snack/small meal for later.
This recipe was from my newest addition to my cookbook collection: 125 Best Blender Recipes. I bought this little magazine style cookbook about a week ago, because I knew I would be needing some good blender recipes. They have smoothies, cocktails, soups, salad dressings, and more, so I figured it would be a worthy investment even if I wasn't in the dorms.
Banana Peanut Butter Smoothie
Ingredients:
1 small ripe banana, cut in half
1 tsp creamy peanut butter (I used 2. You can never have too much PB, right?)
1/2 cup low fat milk (I used skim)
Ice (I used about 2 cups)
Directions:
In blender, combine banana, milk, peanut butter, and ice. Blend until mixture is smooth and frothy.
Makes 1 smoothie: 165 calories, 6 g protein, 28 g carbs, 4 g total fat (2 g saturated), 2 g fiber, 5 mg cholesterol, 85 mg sodium

Taste Rating: 6
I'm definitely going for a whole tablespoon of peanut butter next time. It's just a teeny bit bland, but that could also be from using skim milk instead of 1 or 2%. My banana also wasn't that ripe, so a riper banana would add some extra sweetness.
Easy Rating: 9
Pour everything into a blender and press a button...
Overall Rating: 7.5
I think with the extra peanut butter and a riper banana, this would be pretty good. I'm thinking I'll make it for breakfast next time.
This recipe was from my newest addition to my cookbook collection: 125 Best Blender Recipes. I bought this little magazine style cookbook about a week ago, because I knew I would be needing some good blender recipes. They have smoothies, cocktails, soups, salad dressings, and more, so I figured it would be a worthy investment even if I wasn't in the dorms.
Banana Peanut Butter Smoothie
Ingredients:
1 small ripe banana, cut in half
1 tsp creamy peanut butter (I used 2. You can never have too much PB, right?)
1/2 cup low fat milk (I used skim)
Ice (I used about 2 cups)
Directions:
In blender, combine banana, milk, peanut butter, and ice. Blend until mixture is smooth and frothy.
Makes 1 smoothie: 165 calories, 6 g protein, 28 g carbs, 4 g total fat (2 g saturated), 2 g fiber, 5 mg cholesterol, 85 mg sodium

Taste Rating: 6
I'm definitely going for a whole tablespoon of peanut butter next time. It's just a teeny bit bland, but that could also be from using skim milk instead of 1 or 2%. My banana also wasn't that ripe, so a riper banana would add some extra sweetness.
Easy Rating: 9
Pour everything into a blender and press a button...
Overall Rating: 7.5
I think with the extra peanut butter and a riper banana, this would be pretty good. I'm thinking I'll make it for breakfast next time.
Saturday, June 11, 2011
Cranberry Walnut Oatmeal
I'm officially out of my apartment and into the dorms! I'm SUPER excited about my job this summer. For those of you who don't know, I'm a teaching assistant for Duke TIP. The program gives gifted students a chance to take a class during the summer. There are some pretty cool classes being offered, like mock trial, creative writing, modern medicine, and more. My class is called mathematical problem solving. So far, it seems like I'm really going to enjoy this. I can't wait for the TIP-sters to get here tomorrow!
Training has been crazy busy, but I finally have a chance to cook! This recipe was inspired by one from "Hicky's Healthy Handbook." I got this cookbook as a gift from Spurs PC 11, and it's packed full of so many healthy recipes! The very first recipe in this book is for Cherry-Hazelnut Oatmeal. I'm not using the exact recipe, but it served as an inspiration for the one below.
Cranberry Walnut Oatmeal
Ingredients:
1 package instant oatmeal, original (unflavored)
1/2 cup skim milk
1 tsp brown sugar
1 1/2 tbsp dried cranberries
1 1/2 tbsp chopped walnuts
Dash of ground cinnamon
Directions:
Cook the oatmeal according to package instructions, replacing water with skim milk. Once it is cooked completely, add the remaining ingredients and stir to combine.

Taste Rating: 6
Not too bad. It's oatmeal, so you're not going to get an "ooooh my gosh this is amazing" from it unless somebody sprinkled fairy dust in it or something. I will say this is waaay better than those pre-flavored things you get at the store. The walnuts add a really nice crunch to it.
Easy Rating: 9
Microwave and mix. What could be easier? I am not giving this a 10, because I'm dishwasher-less, meaning I have to wash my bowl and spoon by hand in a bathroom sink. If I had a dishwasher, the easy cleanup would justify giving this a 10.
Overall Rating: 7
Since breakfast is the most important meal of the day (not only to give you fuel, but it can actually help you lose weight). This one dish has whole grains, antioxidants, good fats, protein, calcium, etc. All of that in 5 minutes? Win.
Training has been crazy busy, but I finally have a chance to cook! This recipe was inspired by one from "Hicky's Healthy Handbook." I got this cookbook as a gift from Spurs PC 11, and it's packed full of so many healthy recipes! The very first recipe in this book is for Cherry-Hazelnut Oatmeal. I'm not using the exact recipe, but it served as an inspiration for the one below.
Cranberry Walnut Oatmeal
Ingredients:
1 package instant oatmeal, original (unflavored)
1/2 cup skim milk
1 tsp brown sugar
1 1/2 tbsp dried cranberries
1 1/2 tbsp chopped walnuts
Dash of ground cinnamon
Directions:
Cook the oatmeal according to package instructions, replacing water with skim milk. Once it is cooked completely, add the remaining ingredients and stir to combine.

Taste Rating: 6
Not too bad. It's oatmeal, so you're not going to get an "ooooh my gosh this is amazing" from it unless somebody sprinkled fairy dust in it or something. I will say this is waaay better than those pre-flavored things you get at the store. The walnuts add a really nice crunch to it.
Easy Rating: 9
Microwave and mix. What could be easier? I am not giving this a 10, because I'm dishwasher-less, meaning I have to wash my bowl and spoon by hand in a bathroom sink. If I had a dishwasher, the easy cleanup would justify giving this a 10.
Overall Rating: 7
Since breakfast is the most important meal of the day (not only to give you fuel, but it can actually help you lose weight). This one dish has whole grains, antioxidants, good fats, protein, calcium, etc. All of that in 5 minutes? Win.
Monday, June 6, 2011
Let the Dorm Cooking Begin
Today is my last day in my apartment. All of my stuff goes into storage this afternoon, except for the clothes and things that I'm bringing to the dorms with me. I'm excited to start my summer job, but I'm also sad to have to live in the dorms again. Because I don't want to completely abandon my blog for the summer, I'm going to try to do at least one "dorm cooking" recipe a week. I know a lot of you are regular dorm dwellers, so now you'll have some recipes that you can make without a kitchen! And for those of you who do have a kitchen, these should just be easy, stove and oven free recipes that don't require a lot of prep or clean up.
The only kitchen things I'm bringing with me are my blender, microwavable bowls/plates, and some utensils. The dorm rooms come with a mini fridge and a microwave. Armed with these supplies, we'll see what sort of things I come up with :-). Let the dorm cooking begin!
The only kitchen things I'm bringing with me are my blender, microwavable bowls/plates, and some utensils. The dorm rooms come with a mini fridge and a microwave. Armed with these supplies, we'll see what sort of things I come up with :-). Let the dorm cooking begin!
Thursday, May 26, 2011
Tequila Glazed Grilled Chicken Thighs
My next "get rid of it" ingredient is chicken thighs! I forget what I used these in, but I only used half of a package. The rest ended up in my freezer. I think sometimes recipes just fall into my hands at the perfect time, which is exactly what happened with this chicken thigh recipe. I found it in Cooking Light magazine about a week ago, and I tore out the page. That page resurfaced today while I was going through some stacks of paper. Not only did the picture look delicious, but I had every single ingredient already. What a perfect recipe to get rid of things before I move out!

Recipe Notes: I used boneless skinless thighs instead of bone-in.
Tequila-Glazed Grilled Chicken Thighs
Ingredients:
1 1/2 tsp ground cumin
1 tsp chili powder
3/4 tsp kosher salt
1/4 teaspoon chipotle chili powder
6 bone-in chicken thighs, skinned
3/4 cup pineapple juice
1/3 cup tequila (or substitute more pineapple juice if you don't want to use tequila)
1/4 cup honey (I just used about 2 tbsp. I didn't want it too sweet)
2 tsp cornstach
2 tsp water
2 tsp lime zest (I used 2 limes)
3 tbsp fresh lime juice (just juices my 2 limes!)
1/4 tsp crushed red pepper
Cooking spray
1. Preheat grill to medium-high heat using both burners. After preheating, turn the left burner off.
2. Combine the first 4 ingredients in a small bowl; rub evenly over chicken
3. Bring the pineapple juice, tequila, and honey to a boil in a small saucepan; cook until reduced to 3/4 cup (about 10 minutes). Combine cornstarch and 2 teaspoons water in a small bowl, and stir well. Add cornstarch mixture to juice mixture, stirring constantly with a whisk. Bring to a boil and cook for 1 minute, stirring constantly. Remove from heat, and stir in lime zest, lime juice, and red pepper.
4. Place chicken on grill rack coated with cooking spray over right burner (direct heat). Cover and grill for 5 minutes on each side, basting occasionally with juice mixture. Move the chicken to grill rack over left burner (indirect heat). Cover and grill an additional 5 minutes on each side or until done, basting occasionally. Yield: 6 servings, serving size: one thigh
Calrories: 241; Fat: 7.6 g (sat 2.1 g, mono 2.8 g, poly 1.7 g); Protein: 18 g; Carb: 17.2 g; Fiber 0.4 g; Chol 64 mg; Iron 12 mg; Sodium 374 mg; Calc 19 mg

Taste Rating: 8.5
This is a do-over for sure. It's like a sweet spicy flavor explosion in your mouth. All of the cumin and chili powder flavors really come through, but they're still balanced out by the mild sweetness of the glaze. Plus dark meat is so much more flavorful and tender than white meat. I could have probably eaten the entire recipe in one sitting.
Easy Rating: 5
This used quite a few dishes/bowls, so clean up was a pain. It also took a little bit of time to grill, so this isn't a good recipe to make if you have to get somewhere. Nothing was very difficult, it just wasn't one of those quick and convenient recipes.
Overall Rating: 7
It was definitely good enough to make again, even though they weren't super easy. I'm excited for leftovers!
This is a do-over for sure. It's like a sweet spicy flavor explosion in your mouth. All of the cumin and chili powder flavors really come through, but they're still balanced out by the mild sweetness of the glaze. Plus dark meat is so much more flavorful and tender than white meat. I could have probably eaten the entire recipe in one sitting.
Easy Rating: 5
This used quite a few dishes/bowls, so clean up was a pain. It also took a little bit of time to grill, so this isn't a good recipe to make if you have to get somewhere. Nothing was very difficult, it just wasn't one of those quick and convenient recipes.
Overall Rating: 7
It was definitely good enough to make again, even though they weren't super easy. I'm excited for leftovers!
Monday, May 23, 2011
Sesame Ginger Salmon en Papillote
Only 2 more weeks until I move out of my apartment and into the dorms. That means it's time to start eating everything in my fridge/freezer. I buy my salmon in frozen shrink-wrapped portions, so this was on my list of things to cook. I had seen this recipe on Kelsey's Essentials a couple of months ago, and I've been waiting to try it ever since.
Fold 4 (16 by-12-inch) parchment paper squares in 1/2 lengthwise.
Evenly divide the bok choy, bell peppers, and bean sprouts among the 4 parchment packets. Season the vegetables with 1 tablespoon sesame-ginger marinade. Place a salmon fillet on top of the vegetables and season with the black pepper and an additional tablespoon of the marinade.
Fold the top half of the parchment over the fish, and overlap small folds along the open edge to seal. Brush each packet with olive oil. Bake for 8 to 10 minutes, until the parchment paper puffs up.
Transfer the parchment packets to plates. Carefully cut the packets open, avoiding the hot steam, and serve.

Cooking en papillote (which literally means "in paper") is something I have actually done before. Another example is the recipe I made for Caribbean Shrimp Packets. You basically put the entire meal into parchment paper (or aluminum foil), wrap it up and bake it. The flavors all cook into each other, and all of the moisture is trapped inside the packet.
Recipe Notes: I also added a handful of sugar snap peas to each packet. I modified the marinade a little bit, so those changes are in parentheses below.
Sesame-Ginger Salmon en Papillote
Ingredients:
Zest of half an orange
1 tsp peeled, minced fresh ginger (I used the kind in the jar. You can find it in the Asian foods aisle. I also used about a teaspoon and a half.)
3 tbsp soy sauce
1 tbsp orange juice
2 teaspoons rice vinegar
2 teaspoons sesame oil (I only used 1. Sesame oil is REALLY strong, and I was worried to would be too much)
2 heads baby bok choy, ends trimmed and cut into thirds through the stem (I just cut up a head of regular bok choy)
1 red bell pepper, seeded and thinly sliced (I only used half, because I made two packets)
1/2 cup bean sprouts (I ended up using a handful in each packet, which was a total of I'm guessing 1 1/2 cups)
4 (6-ounce) salmon filets
1/3 cup diagonally thinly sliced scallions for garnish
Directions:
Preheat the oven to 425 degrees F. Combine the orange zest, ginger, soy sauce, orange juice, vinegar, and sesame oil together in a small bowl; set aside.Fold 4 (16 by-12-inch) parchment paper squares in 1/2 lengthwise.
Evenly divide the bok choy, bell peppers, and bean sprouts among the 4 parchment packets. Season the vegetables with 1 tablespoon sesame-ginger marinade. Place a salmon fillet on top of the vegetables and season with the black pepper and an additional tablespoon of the marinade.
Fold the top half of the parchment over the fish, and overlap small folds along the open edge to seal. Brush each packet with olive oil. Bake for 8 to 10 minutes, until the parchment paper puffs up.
Transfer the parchment packets to plates. Carefully cut the packets open, avoiding the hot steam, and serve.

Taste Rating: 7
I would have changed a couple of things. First, my sugar snap peas experiment was a bust. The box choy was pretty soggy. Here's what I will use next time for my veggie mixture: broccoli, red bell pepper, bean sprouts, and onion. I may throw in some canned water chestnuts too. The marinade I wouldn't change at all though (from what I changed originally). It made the salmon sooooooo good. It almost tasted creamy. That's how I know this recipe has real potential, I think I just need some different veggies!
Easy Rating: 8
Obviously, cutting veggies is a requirement. The marinade was really easy, especially since I used pre-minced ginger. The whole folding thing was a little difficult, but I think with some practice it would get a lot easier. The best part though...clean up. All of the cooking is done inside the packets, so my pan didn't get dirty at all. I just had to rinse out my marinade bowl and wash my cutting board.
Overall Rating: 8
I really think this recipe has so much potential. The marinade and the salmon were delicious, and those are really the two most important things in the recipe.
Friday, May 20, 2011
Baked Fish & Chips
If I were to list my top 5 favorite things to eat, fish and chips would definitely be on that list. I tried it for the first time at a street vendor in Brighton, England (a really cute town on the southern coast! I went during the summer of 2007 with my aunt and uncle, and we went down to the boardwalk one afternoon.) I actually didn't really like fish and chips it the first time I tried it. Salt and vinegar hadn't really become a common flavor combo in the U.S. yet, so I think my taste buds just weren't used to it. I'm not really sure when I started liking it, but sometime between my first fish and chips experience and now, I have fallen in love.
Position racks in the upper and lower thirds of the oven and preheat to 450 degrees F using the convection setting, if available. Place a baking sheet on one of the racks to preheat.
Prepare the chips: Toss the potato sticks with the olive oil and cayenne in a bowl. Carefully remove the hot baking sheet from the oven, add the potatoes and spread in an even layer. Use a rubber spatula to scrape any oil from the bowl over the potatoes. Bake on the top oven rack, turning once, until browned and crisp, 25 to 30 minutes. Season with salt.
Meanwhile, make the fish: Set a wire rack on a baking sheet and coat with cooking spray. Put the panko crumbs in a plate or shallow dish. Add seafood seasoning, onion powder, garlic powder, cayenne, and S&P to taste. In a bowl, whisk the egg whites and a pinch of salt until frothy.
Dip the fish in the egg whites, then roll in the bread crumbs to coat. Place the fish pieces on the rack (position them on their sides so that the majority of the crust is exposed) and mist with cooking spray.
Bake the fish on the bottom oven rack until crisp and just cooked through, about 12 minutes. Serve the fish and chips with tartar sauce and/or malt vinegar, if desired.

Obviously, battered and deep fried fish and "chips," which we Americans like to call fries, is not healthy. I came up with this recipe...a conglomeration of about 6 different recipes I found online...for a baked version, hoping that I could find a tasty alternative.
Ingredients:
For the fish:
1 lb. firm white fish, cut into 1 1/2 in. wide strips (I found recipes that used cod, pollock, halibut, tilapia...basically it doesn't matter, just use what you like. Cod was on sale, so that's what I used)
S&P
2 cups panko bread crumbs, whole wheat if you can find them
1 tsp seafood seasoning, such as Old Bay
1 tsp garlic powder
1 tsp onion powder
1/4 tsp cayenne pepper
4 large egg whites
Olive Oil cooking spray
Malt Vinegar for serving
For the chips:
3 medium baking potatoes, cut into 1/4 in. wide sticks
1 tbsp extra virgin olive oil
Salt to taste
Pinch of cayenne pepper
Directions (these came from this recipe: baked fish and chips. I changed them a little bit to include my ingredients):
Prepare the chips: Toss the potato sticks with the olive oil and cayenne in a bowl. Carefully remove the hot baking sheet from the oven, add the potatoes and spread in an even layer. Use a rubber spatula to scrape any oil from the bowl over the potatoes. Bake on the top oven rack, turning once, until browned and crisp, 25 to 30 minutes. Season with salt.
Meanwhile, make the fish: Set a wire rack on a baking sheet and coat with cooking spray. Put the panko crumbs in a plate or shallow dish. Add seafood seasoning, onion powder, garlic powder, cayenne, and S&P to taste. In a bowl, whisk the egg whites and a pinch of salt until frothy.
Dip the fish in the egg whites, then roll in the bread crumbs to coat. Place the fish pieces on the rack (position them on their sides so that the majority of the crust is exposed) and mist with cooking spray.
Bake the fish on the bottom oven rack until crisp and just cooked through, about 12 minutes. Serve the fish and chips with tartar sauce and/or malt vinegar, if desired.

Taste Rating: 7.5
According to Brink, it was really good but not heavy. He went back for extra helpings, so I'm assuming he liked it. I liked it too. It's probably not something I would make for like a dinner party, but it was still a really tasty weekday meal!
Easy Rating: 7
The potatoes were kind of a pain to cut, but that's pretty typical with potatoes. The fish was easy. Just dip in the egg, roll in the breadcrumbs, and put it on a cookie sheet.
Overall Rating: 7.5
Sunday, May 15, 2011
Barbeque Chicken Pizza
Congrats, class of 2011! Graduation was Saturday, so we are officially graduates of Trinity University. That means I have three weeks of nothing! My summer job starts on June 7. I'll be moving back into the dorms at Trinity and teaching a math class for the Duke TIP summer program. I'm excited to get some hands on experience in math education, but I'm sad to lose my kitchen for two months. I want to cook as much as possible until then, so expect the frequency of my blog entries to increase for the next couple of weeks.
 Directions:
I haven't made a pizza since my first entry ever, so I figured it was time to try a new one. I love barbeque chicken pizza, but the only place you can really get it is California Pizza Kitchen. Being a student, that's not exactly in my budget, so I was hoping I could recreate my own version at home. I started looking up recipes online, and after looking at a few, I came up with this. I used some pre-cooked ingredients to lighten the work load.
Barbeque Chicken Pizza
Ingredients:
1 pre-baked pizza crust (use a whole wheat thin crust for maximum nutrients with minimal calories. I couldn't find a whole wheat one, so I just got the thinnest crust I could find.)
1/2 cup BBQ sauce (I like Stubb's Original. I love that I can get Stubb's sauce in a bottle!)
1 boneless skinless pre-cooked chicken breast, cut into cubes (find this in the pre-cooked meats section)
1/4 red onion, thinly sliced
1 cup shredded mozzarella
1/2 cup chopped fresh cilantro

Spread the sauce on the crust, and top with cubed chicken breasts, onion, and mozzarella. Bake according to instructions on the crust package, until cheese is melted and starts to brown on top. Top with cilantro, cut into 8 pieces, and serve.

Taste Rating: 10!
This was delicious! I even went back for seconds :-)
Easy Rating: 8
All you have to do is chop some onion and cut up a chicken breast. Other than that, you just throw everything onto a crust and bake it. From start to finish, cooking this meal took 20 minutes. I love pre-cooked ingredients!
Overall Rating: 9
This is probably a top 5 favorite meal for me. I also calculated calories per slice, and I'm estimating about 125...that's not a lot for something super delicious. Three slices of pizza and a salad for 450 calories? Talk about satisfying and guilt free! Another plus: This whole pizza was less than $5. Is this too good to be true?

Taste Rating: 10!
This was delicious! I even went back for seconds :-)
Easy Rating: 8
All you have to do is chop some onion and cut up a chicken breast. Other than that, you just throw everything onto a crust and bake it. From start to finish, cooking this meal took 20 minutes. I love pre-cooked ingredients!
Overall Rating: 9
This is probably a top 5 favorite meal for me. I also calculated calories per slice, and I'm estimating about 125...that's not a lot for something super delicious. Three slices of pizza and a salad for 450 calories? Talk about satisfying and guilt free! Another plus: This whole pizza was less than $5. Is this too good to be true?
Fish Tacos with Chipotle Cream
One of my favorite places to eat in San Antonio is Tycoon Flats. They have delicious food, great drinks (Microbrews and Dos-a-ritas? Like.), and the atmosphere is so relaxed. Even though Flats is known for burgers, I love their fish tacos. I wanted find a way to recreate them, and this recipe from Ellie Krieger had great reviews.
Recipe Notes: 1. For my fish, I used pangasius. I had never even heard of this until a couple months ago when I was at the fish counter looking for tilapia, and I noticed that this stuff was dirt cheap. The fish guy said it was actually pretty good, so I tried it and liked it. It's really mild, but it's a little more moist than tilapia. 2. Instead of chopping my own cabbage, I just used some bagged cole slaw mix from the produce section. 3. I used bottled lime juice in my marinade, just because I had some around. 4. I also didn't feel like getting my grill pan out, so I just used a saute pan to cook the fish.
Fish:
2 tablespoons olive oil
2 tablespoons freshly squeezed lime juice
1/4 teaspoon salt
Freshly ground black pepper
1 pound white flaky fish fillet, like tilapia or halibut
Recipe Notes: 1. For my fish, I used pangasius. I had never even heard of this until a couple months ago when I was at the fish counter looking for tilapia, and I noticed that this stuff was dirt cheap. The fish guy said it was actually pretty good, so I tried it and liked it. It's really mild, but it's a little more moist than tilapia. 2. Instead of chopping my own cabbage, I just used some bagged cole slaw mix from the produce section. 3. I used bottled lime juice in my marinade, just because I had some around. 4. I also didn't feel like getting my grill pan out, so I just used a saute pan to cook the fish.
Ingredients
Fish:
2 tablespoons olive oil
2 tablespoons freshly squeezed lime juice
1/4 teaspoon salt
Freshly ground black pepper
1 pound white flaky fish fillet, like tilapia or halibut
Chipotle cream:
1/2 cup plain nonfat yogurt
2 tablespoons mayonnaise
2 teaspoons chipotle pepper, in adobo sauce (I finely chopped one pepper and then added about a tablespoon of the adobo sauce. I like it hot!)
8 (6-inch) corn tortillas
1 1/2 cups shredded green cabbage or lettuce
1/2 cup corn kernels (thawed if frozen) (I left these out)
1/4 cup fresh cilantro leaves
Lime wedges
1/2 cup plain nonfat yogurt
2 tablespoons mayonnaise
2 teaspoons chipotle pepper, in adobo sauce (I finely chopped one pepper and then added about a tablespoon of the adobo sauce. I like it hot!)
8 (6-inch) corn tortillas
1 1/2 cups shredded green cabbage or lettuce
1/2 cup corn kernels (thawed if frozen) (I left these out)
1/4 cup fresh cilantro leaves
Lime wedges
Directions
In a small bowl, whisk together the oil, lime juice, salt and pepper. Pour over the fish fillets and let marinate for 20 minutes. Put the yogurt into a strainer lined with apaper towel and place over a bowl to drain and thicken for 20 minutes.
Remove the fish from the marinade and grill on a preheated grill or nonstick grill pan over a medium-high heat until cooked thorough, about 3 minutes per side. Set the fish aside on a plate for 5 minutes.
In a small bowl combine the thickened yogurt, mayonnaise, and chipotle pepper.
Heat the tortillas on the grill or grill pan for 30 seconds on each side.
Flake the fish with a fork. Top each tortilla with 1 tablespoon of the chipotle cream. Top with fish, cabbage, corn and cilantro and serve with lime wedges.

Taste Rating: 8
The chipotle cream made the dish. It was such a great flavor!
Easy Rating: 8
Fish cooks so fast, so that was definitely a plus. Another plus, I could get all of my ingredients ready while the fish was marinating. I made the cream, sliced the lime wedges, and got out the cilantro and cabbage. Everything was ready to go, so all I had to do was cook the fish!
Overall Rating: 8
In a small bowl, whisk together the oil, lime juice, salt and pepper. Pour over the fish fillets and let marinate for 20 minutes. Put the yogurt into a strainer lined with apaper towel and place over a bowl to drain and thicken for 20 minutes.
Remove the fish from the marinade and grill on a preheated grill or nonstick grill pan over a medium-high heat until cooked thorough, about 3 minutes per side. Set the fish aside on a plate for 5 minutes.
In a small bowl combine the thickened yogurt, mayonnaise, and chipotle pepper.
Heat the tortillas on the grill or grill pan for 30 seconds on each side.
Flake the fish with a fork. Top each tortilla with 1 tablespoon of the chipotle cream. Top with fish, cabbage, corn and cilantro and serve with lime wedges.

Taste Rating: 8
The chipotle cream made the dish. It was such a great flavor!
Easy Rating: 8
Fish cooks so fast, so that was definitely a plus. Another plus, I could get all of my ingredients ready while the fish was marinating. I made the cream, sliced the lime wedges, and got out the cilantro and cabbage. Everything was ready to go, so all I had to do was cook the fish!
Overall Rating: 8
Subscribe to:
Posts (Atom)